Uncategorized

Lemony Lima Bean Hummus with Chillies & Smoked Garlic

Easy fast delicious hummus made with lima beans – aka butter beans. It takes only minutes to make using cooked beans from a tin and it’s delicious!

Ingredients

• 1 (400g / 14oz) tin of Lima/Butter Beans drained, reserve 15 ml/1Tbsp of the liquid
• 2 cloves of Smoked or regular Garlic* (skin removed)
• 45ml / 3 tablespoons Fresh Lemon Juice
• 30ml / 2 tablespoons Tahini
• 25ml / 1.5 tablespoons Olive Oil
• 3g / 0.5 teaspoons Salt
• 1 small chilli pepper (variety/hotness of your choice), finely chopped, reserve a bit for garnish
• 2.5ml / 1/2 teaspoon Lemon Zest, plus extra for garnish
• Drizzle of Olive oil, and a sprinkle of Parsley for garnish

Method

Throw the peeled garlic into the food processor and chop it finely, then add all the other ingredients (except the garnishes) and blend until smooth. Taste and add more salt if necessary, and if it’s too thick, drizzle in extra lemon juice or a bit of water to desired consistency.

Put in a container or on a plate and garnish with a few sprinkles of chopped chillies, lemon zest, a couple of pinches of fresh or dried parsley, and a good swirl of olive oil.

Serve with pita chips, vegetable, or crackers. You can dig in immediately but I find it’s better chilled and eaten after allowing the flavours to meld a bit.

*If you don’t have smoked garlic, you can use regular garlic and add a drop of liquid smoke (or omit the smoke flavour, it will still be delicious).

Foraging, Free food, Natural food, superfoods, Vegetarian

Apocalypse Garlicky Three Cheese Nettle Pasta Shells

Well, it apparently takes an apocalypse to get me back writing. So hi there! Currently on lockdown in England due to the Covid-19 pandemic. And cooking!

Fortunately, although we are pretty restricted at the moment, I have a backyard (“back garden” for the Brits), and it looks like something out of Day of the Triffids. The stinging nettles are finally poking their heads up and looking around. We have had an unusually cold spring I think. Anyhow, I had a wander out this afternoon, gathered some nettles, and mixed up a garlicky pasta stuffing. No idea how it is going to taste as it is only going in the oven at supper time, but I did lick the mixing spoon when I was done, and it was pretty damn tasty!

Here’s the process in pictures, if you want the recipe, give a shout out: I wrote it down as I was concocting! I made two dishes of these beauties, and the last photo is of the second dish (before cheese), with the addition of artichoke hearts. Hope you are doing your utmost to stay safe. And tell me what you’re cooking!

Important note about picking nettles! Many different types of butterflies lay their eggs on nettles so please forage responsibly – take only what you need and PLEASE check tops and undersides of the nettles for butterfly eggs before picking! If you are new to this information, they look like this.

Uncategorized

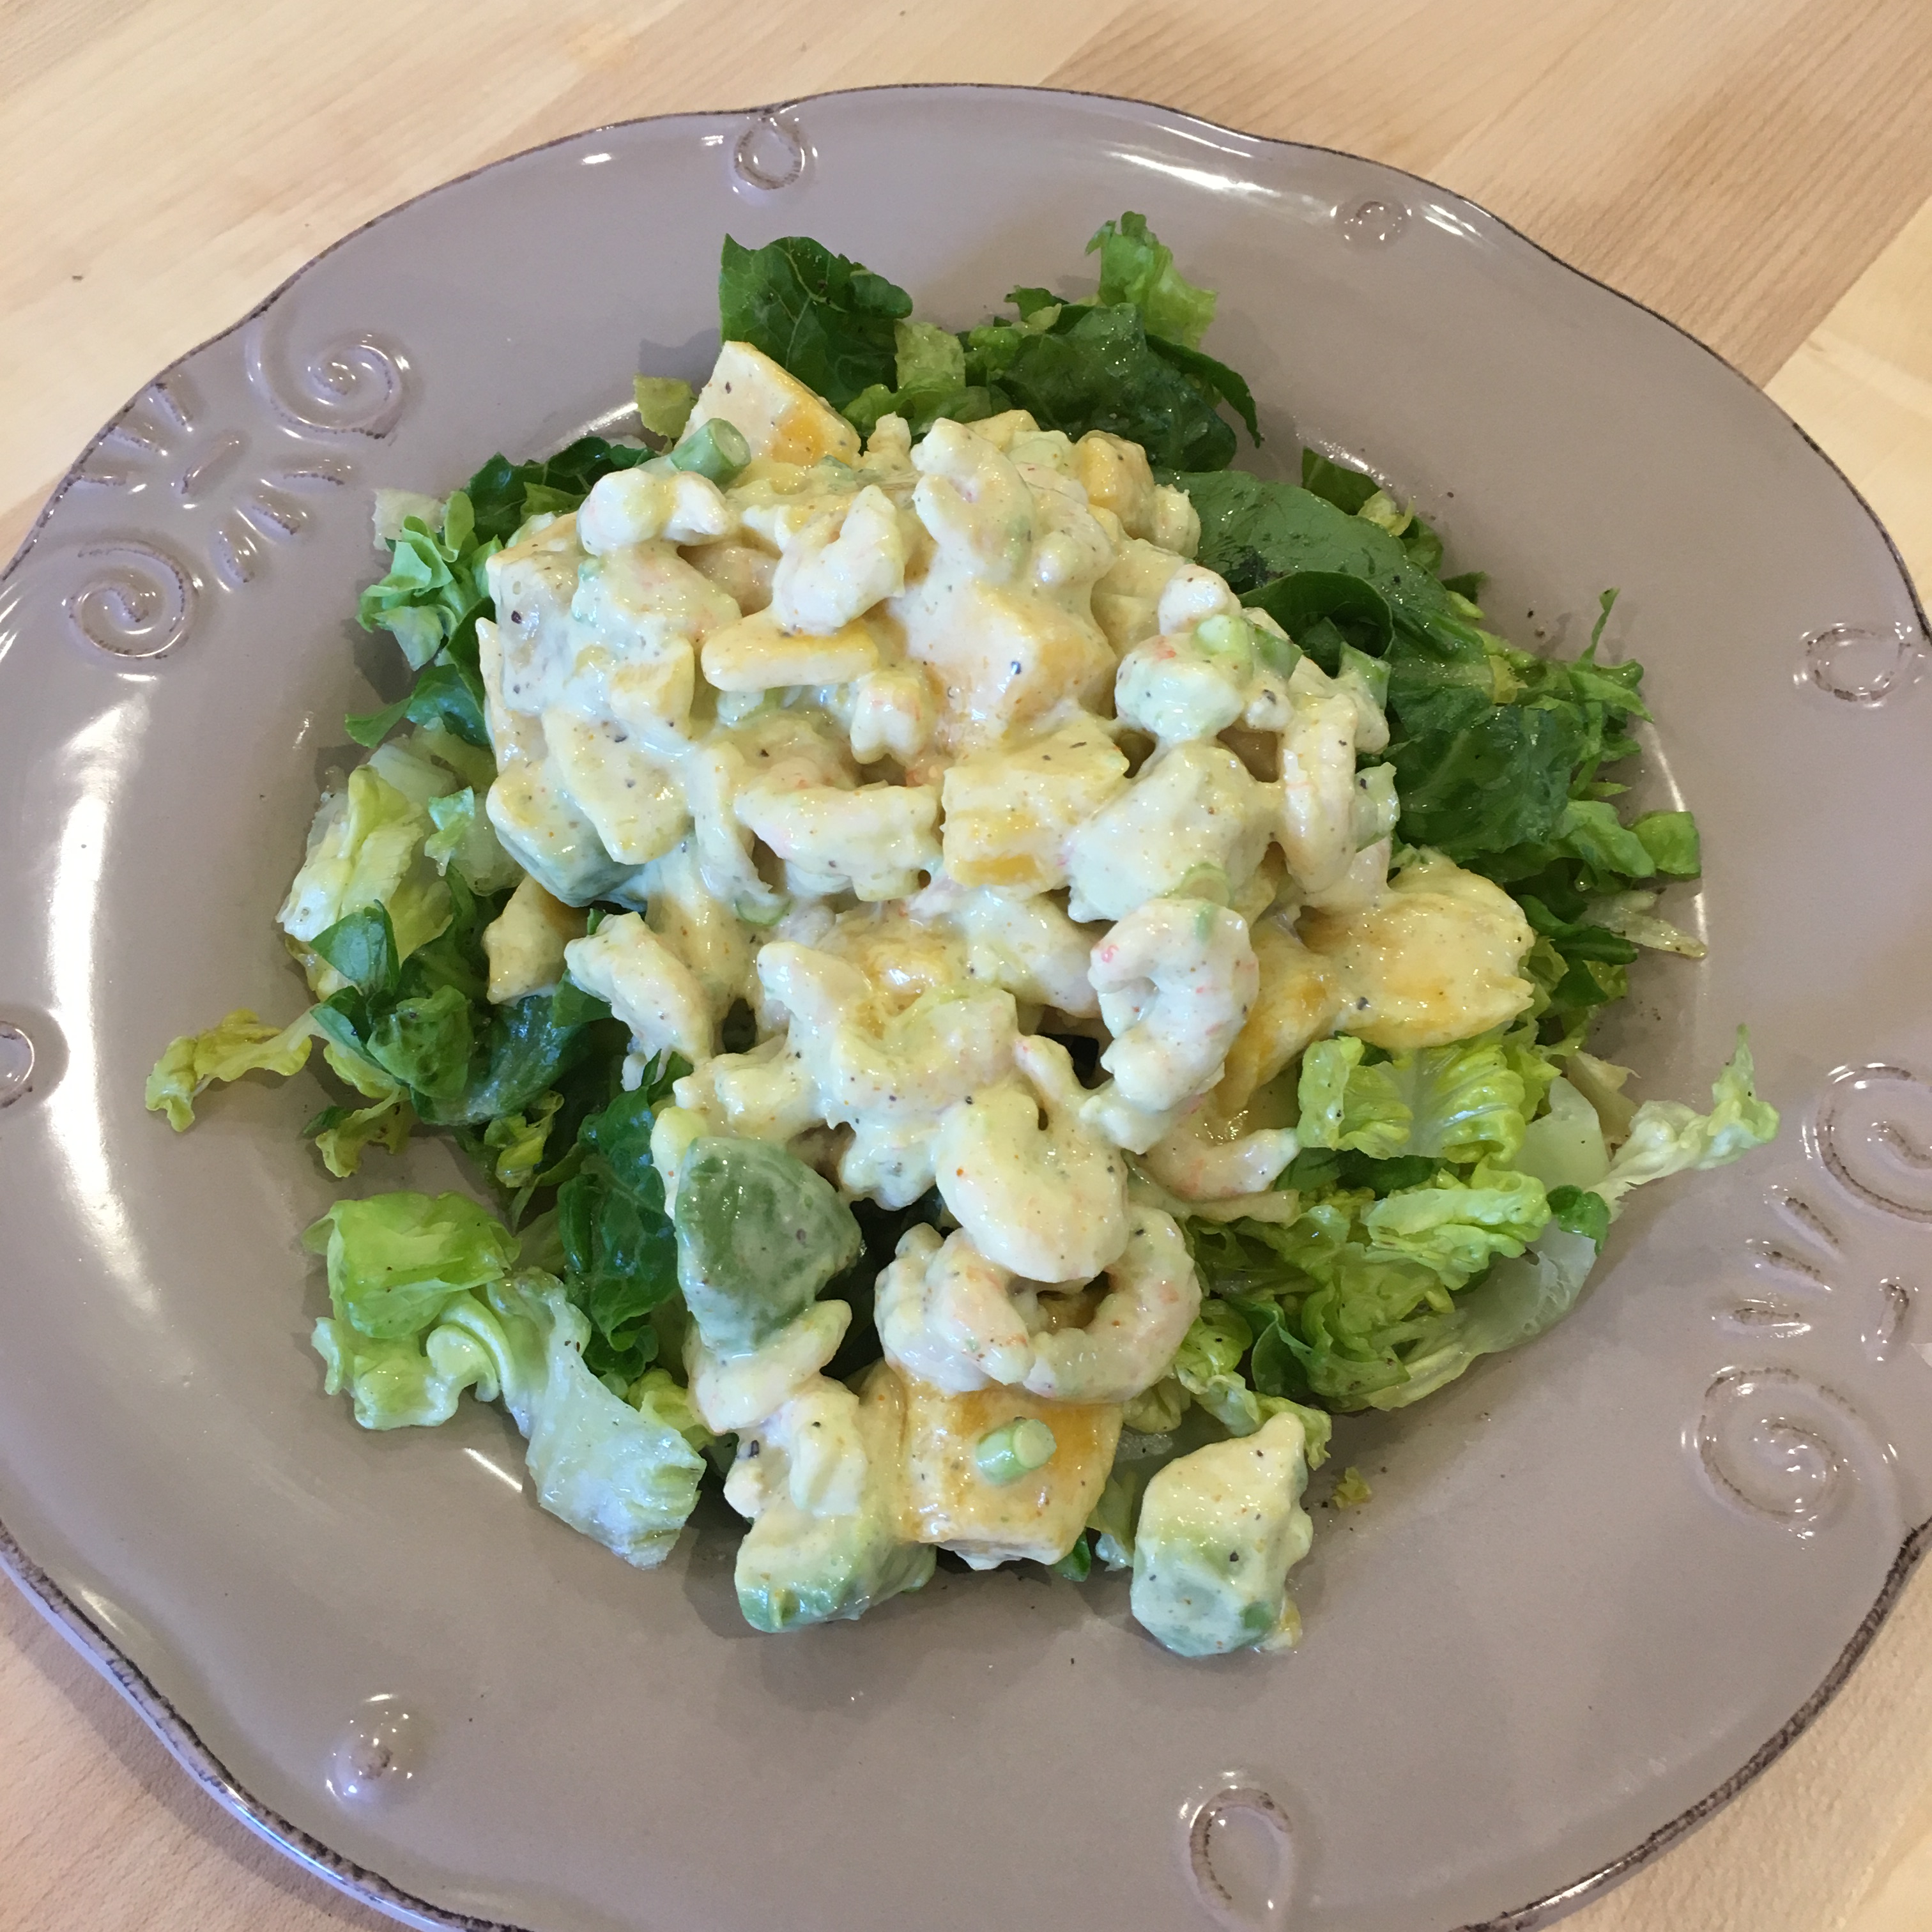
CURRIED SHRIMP SALAD WITH MANGO AND AVOCADO

Serves two as main course, four-to-six as appetiserIMG_0835

  • 2 little gem lettuces (or other lettuce) sliced into ribbons, washed and spun dry
  • olive oil
  • sherry vinegar (or white wine, white balsamic,  or cider vinegar)
  • salt and pepper

Dressing Ingredients

  • 2 green onions, diced finely
  • 45 ml Veganaise or mayonnaise
  • 2.5 ml curry powder (or more to taste)
  • 1/2 lemon, juice of
  • salt and freshly ground pepper to taste
  • 300 grams small shrimp* (prawns in UK) (I used Greenland shrimp in brine from Costco, rinsed well and drained)
  • 1 large ripe mango peeled and cubed
  • 1 large ripe avocado (pit and peel removed, cubed)
  • Freshly chopped coriander (cilantro)

METHOD

Prepare the lettuce, toss with oil, vinegar, and salt and pepper and divide onto two plates.

Mix the dressing ingredients in a bowl until combined and smooth. Add the shrimp, mango and avocado and toss gently to fully coat it. Divide onto lettuce plates, sprinkle with fresh chopped coriander if desired.

* (If you cook your own shrimp, ensure that you chill them before using – and of course they must be peeled and deveined)

Uncategorized

Egg Replacement in Recipes

If you are vegan or cooking for a vegan, you likely will have heard of a “flax egg” to replace a regular egg in recipes.  If you don’t like flax, don’t have any on hand, or want to try something different, check out the myriad of other possibilities for veganising your recipes. All of the following information is from vegweb.com

========================================================

Ground flax seeds
Egg replacing in baking can be a lot more creative than relying on boxed egg replacer. When veganizing muffins, cookies, and cakes, a good go-to egg substitute is ground flax seeds. Cheap and nutritious, when blended with a little bit of water—three tablespoons of water to one tablespoon of ground flax yields about one “egg”—flax creates a mixture that binds baking ingredients together.

Bananas
When making banana bread and other cakes containing bananas, the fruit itself has binding qualities and can stand in as an egg replacer. For every egg you need, simply mash or purée 1/2 banana.

Other egg substitutions. Try any number of the following :

Baking powder & baking soda
1 egg = 1-1/2 tablespoons baking powder + 1-1/2 tablespoons warm water + 1-1/2 tablespoons oil (use = leavening)
1 egg = 1-1/2 tablespoons baking powder + 1 tablespoon warm water + 1 tablespoon apple cider vinegar (use = leavening)
1 egg = 2 teaspoons baking soda + 2 tablespoons warm water (use = leavening)
1 egg = 2 teaspoons baking soda + 2 tablespoons warm water + 1/2 teaspoon oil (use = leavening)
1 egg = 1 teaspoon baking powder + 1 teaspoon vinegar (use = leavening)

Flour
1 egg = 1 teaspoon soy flour + 1 tablespoon water (use = binding + moisture)
1 egg = 3 tablespoons water + 3 tablespoons flour + 1-1/2 teaspoons vegetable shortening, + 1/2 teaspoon baking powder (use = leavening)

Fruit
1 egg = 1/4 cup applesauce or puréed fruit (use = binding and moisture)
1 egg = 1/4 cup pumpkin purée or squash purée (use = binding and moisture)
1 egg = 1/4 cup apricot or prune purée (use = binding and moisture)

Nuts & seeds
1 egg = 3 tablespoons nut butter
1 egg = 1 teaspoon psyllium seed husk + 1/4 cup water (let stand 5 mintues; use = binding and moisture)

Soy
1 egg = 1-1/2 tablespoons lecithin granules + 1-1/2 tablespoons water + 1 teaspoon baking powder (use = leavening)
1 egg = 1/4 cup silken tofu (use = binding and moisture)

Starch
1 egg = 2 tablespoons arrowroot + 1 tablespoon water (use: binding and moisture)
1 egg = 2 tablespoons corn starch + 1 tablespoon water (use: binding and moisture)
1 egg = 2 tablespoons potato starch + 1 tablespoon water (use: binding and moisture)
1 egg = 1-1/2 teaspoon tapioca/corn starch + 1-1/2 teaspoon potato starch + 1/8 teaspoon baking powder + pinch xanthan gum + 3-1/2 tablespoons water + 1 teaspoon oil (whisk to froth; use = leavening)

Other
1 egg = 1 teaspoon yeast dissolved in 1/4 cup warm water (use = leavening)
1 egg = 3 tablespoons vegetable oil + 1 tablespoon water (use = moisture and binding)
1 egg = 3 tablespoons vegan mayonnaise (use = moisture and binding)
1 egg = 3 tablespoons mashed beans (use = moisture and binding)
1 egg = 3 tablespoons mashed potatoes (use = moisture and binding)

Egg white substitution
1 egg white = 1/4 teaspoon xanthan gum + 1/4 cup water (let stand 5 minutes, then whip; use = leavening)

Egg yolk substitution
1 egg = 1-1/2 tablespoons lecithin granules + 2 teaspoons water (use = moisture and binding)


Source: http://vegweb.com/vegweb-guide-egg-replacers

recipes, Vegan, Vegetarian

Rich soya milk

I was itching after some Fab Cakes today and needed some okara to make them, so made some soya milk from beans. Easy to do and the Fab Cakes turned out beautifully!!

I added some homemade cashew cream to the soya milk to make it creamier. I like soya milk but homemade cashew milk is my favourite. Now if I could just figure out how to keep it from separating in coffee, I’d be a very happy camper!

Soya Milk with Cashew Cream added

Okara – can be used right away, refrigerated or frozen

“Fab Cakes” getting their Panko coating before being panfired

“Fab Cakes” with Smokey Chipolate Sauce served with
Caesar Salad topped with Prosciano Violife Vegan Parmesan


All recipes from The Homemade Vegan Pantry: The Art of Making Your Own Staples by Miyoko Mishimoto Schinner

ancient grains, baked goods, Vegan

Low Sugar Healthy Banana Bread

Fast, delicious, nutritious – what’s not to love?kamut-banana-bread

If you’ve not discovered Khorasan KAMUT® flour yet, I encourage you to give it a try.

A recently rediscovered whole grain flour that produces a delicate golden loaf, it is sure to become a favourite. This recipe is so healthy that I don’t even feel guilty about slathering it in butter!  Bonus: it’s DELICIOUS!

Time: Lightening fast!  (From start to in your tummy in just over an hour.)

Yield: makes 1 loaf

Ingredients

  • 2 eggs (or two flax or chia eggs for vegan version+)
  • ½ cup avocado oil, melted coconut oil, or olive oil
  • ¼ cup organic agave syrup
  • ¼ cup milk (for vegan version use oat, almond, rice or soya milk)
  • 1 teaspoon vanilla extract
  • 1¼ cups mashed ripe bananas (about 3 medium bananas)
  • 1¾ cups organic khorasan (KAMUT®) flour (I buy in bulk and freeze this gorgeous flour  Doves Farm Organic Wholegrain Kamut Khorasan Flour 1 kg (Pack of 5)Doves Farm Organic Wholegrain Kamut Khorasan Flour 1 kg (Pack of 5)
  • ½ teaspoon ground cinnamon
  • ¼ teaspoon ground nutmeg
  • 1 teaspoon baking soda
  • 1 tsp baking powder
  • ½ teaspoon sea salt
  • ½ cup chopped walnuts, raisins or dried apricots, optional

Method

  1. Preheat oven to 160C (325F).
  2. Generously butter a 9×5 inch loaf pan and set aside.
  3. In a medium bowl, mix together the flour, baking soda, baking powder, ground nutmeg, cinnamon, and salt. Set aside.
  4. In a large bowl, beat eggs (or flax eggs), oil, agave syrup, milk and vanilla for 2 minutes. Stir in the bananas, flour mixture and optional add-ins if using.
  5. Pour batter into the prepared loaf pan.
  6. Bake for 50-55 minutes or until a toothpick inserted in centre comes out clean.
  7. Cool in pan on rack for 10 minutes, then turn out onto rack to cool.

==========================================================================

==========================================================================

+ Click here for quick guidance on how to make a flax or chai egg

** About KAMUT khorasan flour:

KAMUT® Khorasan Grain is a trademarked type of khorasan grain or triticum turgidum, from Montana in North America. This type of wheat originated in an area called the Fertile Crescent, a region of land which spans from the present-day Jerusalem, through Syria, Lebanon and Iraq. It was in this lush valley that agriculture was thought to be first developed, and the khorasan grain was grown. The grain passed out of common knowledge until being rediscovered and a closed growing programme began.

KAMUT® is a protected species grown exclusively with organic farming methods and under tightly controlled conditions. The KAMUT® International Licensing agreement stipulates that the grain:

• Is the ancient khorasan variety of wheat
• Is grown only as a certified organic grain
• Has a protein range of 12 -18%
• Is 99% free of all contaminating varieties of modern wheat
• Is 98% free of all signs of diseases
• Contains between 400 and 1000 of ppb of selenium

The grain is a summer wheat which is not suited to the UK soil and climate conditions and grows in North America. The crop grows fairly tall and the kernel is large and bold. It has a very large, hump backed kernel.

KAMUT® khorasan flour is light gold in colour and is high in protein, making it perfect for use in pasta, bread and biscuits.

Doves Farm is the licensed UK supplier of KAMUT® khorasan brand grain.

Above information taken from Doves website

gardening, Natural food

Ordered my seeds!

seedsDon’t you just love sitting curled up next to a cosy fire on a cold January’s night, dreaming of the coming spring and browsing through a seed catalogue? I do. And I get so excited poring over the gorgeous photos of vegetables, that I sometimes go a bit bonkers and order things that I really shouldn’t.

It’s easy to go a little overboard, but if one of your goals is to save money on groceries, then it’s logical to focus on what you eat the most of, especially if, like me, you have limited growing space.*

The first thing I did this year was to make a list of what we actually buy on a weekly basis: lettuce, tomatoes, carrots, celery, cauliflower, kale, rocket (arugula), cucumbers, cabbage, onions, garlic, and the “gorgeous ones” – kohlrabi and radicchio, celeriac, and fresh figs. Working from that list,  I narrowed down the list by eliminating things that take a lot of room to grow in the veggie patch, but which are inexpensive to buy: cabbage, onions, potatoes.

I’ve ordered my seeds this year from Baker Creek seeds in the USA. They have an incredible selection and I could buy the European heirloom seeds through them, cheaper than I could buy them over here.  I confess I do feel like a bit of a “buy local” traitor for doing so. Tell me what you plant!


*I could grow a lot more if my husband would consent to me digging up and planting vegetables in some of our lawn areas, but as I’ve not been the best caretaker in recent years of the vegetable plot I currently have, I need to demonstrate that I can take good care of the area I currently plant in. A “no tangled weedy mess” this year is thus my goal.

Green Tomato Pasta Sauce in Jars
Uncategorized

Green Tomato Pasta Sauce

Makes 8-10 500 ml (16 oz) jars

INGREDIENTS

  • 4 – 6 Tbsp olive oil
  • 2 large onions, diced or chopped small in food processor
  • 3 cups sweet pepper (any kind), diced small**
  • 10-20 cloves garlic, minced
  • 22 cups of washed, peeled or unpeeled*, diced small**green tomatoes
  • 10 Tbsp spaghetti sauce spice****
  • 3 cups tomato juice (24 oz or 750 ml)
  • 2 cups water (16 oz or 500 ml)
  • 1/8 cup sugar (25 grams or 31 ml measuring spoon full)
  • 1 Tbsp salt (20 grams or a 15 ml measuring spoon full)
  • 1  tube (200 gram) of tomato paste (or equivalent, approx. 7 ounces or 200 ml)
  • 1.5 Tbsp dried crushed basil leaves(1.5 grams or 22 ml measuring spoon full)***
  • 2 Tbsp dried crushed oregano leaves (2 grams or 30 ml measuring spoon full)***
  • 1 cup red wine (optional – suggest something strong and dry like a Shiraz, but any will work fine)

Method

Step 1
Heat the oil in a large pot. Saute onions, garlic, peppers and spice (not the herbs) until onions soften.

Step 2
Add the tomatoes and toss to coat with the other ingredients. Add the water and tomato juice, mix well, and cook over medium heat, stirring occasionally, until it has all softened nicely and begun to reduced in volume.

Step 3
Prepare your jars (about 8-10   500 ml (16 ounce) and their accompanying lids): wash bottles and lids with hot soapy water, rinse thoroughly with hot water, then rinse again for good measure. Put jars and lids into large pot and boil for 10 minutes to sterilize. Set aside and keep hot.

Step 4
Continue cooking the sauce until it has almost reached the thickened consistency that you prefer. This may take up to an hour depending on your appliance and pot. If you like a super chunky sauce, proceed to step 6.

Step 5
CAREFULLY pour batches of the sauce into your blender and/or food processor (which has been sterilised prior to use) and process to a consistency you like. I do a bit of both, making a combination of smooth sauce and slightly less smooth sauce and then combine them back into the same pot.

Step 6
Add the tomato paste, red wine (optional), sugar and salt to the sauce and continue cooking gently until it reaches the consistency you like for your pasta sauce, then add the dried herbs and cook for another couple of minutes.

Step 7
Carefully pour or spoon the sauce into the sterilised jars, leaving 1/2 inch of head space. Carefully wipe the rims and threads to ensure there is no sauce on them that would prevent a good seal. Put the lids on and tighten, but don’t pull a muscle tightening them too tight!

Step 8
At this point you should process in boiling water (canner) for 10 minutes.

Step 9
Carefully move jars to an out-of-the-way area where they won’t get bumped, and allow to cool completely.

Step 10
Once jars are cold, wipe them all down with a clean damp cloth to remove any sauce on the outside of the bottle. Check the lids. Any jars with lids that have not popped down should be stored in the refrigerator and used within a week.  Label all the other jars and store in cold cellar or other cool dark area where you keep your preserves.

Where’s the Meat?
This sauce is vegan, however if you prefer meat or TVP in your pasta sauce, when you go to use the sauce, cook your meat or TVP and add it at that point. You cannot safely can spaghetti sauce with meat in it unless you use a pressurecanner!

Talk to me about sugar and salt!
You will find recipes with considerably more salt and sugar in them. I prefer to eat as little salt and sugar as possible, so do not add a lot to anything I cook (baking is another story!). If you want to add more to taste, by all means do so.

* When cooking a sauce like this I rarely put myself through the tedious task of plunging the tomatoes into boiling water and peeling them – I chop them small, so when cooked, any peel in unnoticeable, and I get the added bonus of extra fibre! Please note, the measurement is of the usable chopped tomatoes themselves (measure as you go), not of whole tomatoes before chopping!

** As I have readers around the world, I do try to put measurements in all formats, however I do not always weigh ingredients as I prefer to work with North American measuring cups and spoons. So unfortunately, I cannot tell you what these ingredients are in a bushel or peck or ounces or grams as I did not weigh them. If you do not have North American measuring cups on hand, the easiest solution is to find a cup or mug that holds 240 – 250 ml of water and use that as your measuring “cup”.

*** You will notice this recipe calls for dried herbs, as opposed to my usual mantra of fresh herbs only. You are free to use fresh herbs (just triple or quadruple the amounts in volume, not weight). I used dried as I find that fresh herbs are a luxury and flavour is best uncooked  or slightly cooked at most, so when I am making something that is cooked/processed like this, I use dried.

**** My spaghetti sauce spice came from the spice market in Istanbul. I have no idea what is in it, but judging from the taste I would guess it has paprika, oregano, basil, parsley and dried garlic in it.


Uncategorized

Cherry Plum Wine

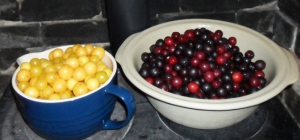
Have you seen the gorgeous little yellow and purple cherry plums on the trees? We are planning to make this on the weekend. Well, start it anyways! It takes about six weeks until it can be bottled. 

Cherry-plums     cherry-plums

Cherry plum wine

2.8 kg cherry plums
1.4 kg sugar
approximately 4 litres of water
1 sachet wine yeast – any red wine yeast will do nicely
1 tsp yeast nutrient
1 tsp pectolase

To extract the juice out of the plums, boil one litre of  water and pour it over the fruit then use the end of a rolling pin, crush the fruit until there are no lumps left. Leave for a few hours then add the rest of the water and the pectolase.

Leave a couple of days then strain through a fine sieve. Put the juice into a saucepan, bring quickly to a boil then immediately turn off the heat. 

Pour the hot juice over the sugar and stir until dissolved. Cool to room temperature. Add the yeast and yeast nutrient. Bring the volume with water to 4.5 litres if necessary. Pour into your demijohn using a funnel. Add the trap. Rack off into a clean demijohn after four to six weeks and again a few weeks later if you want. Bottle when clear – or even if it doesn’t clear completely, bottle it anyway.

ancient grains, baked goods, recipes, Vegetarian

Spelt Bread with Figs and Walnuts

The origins of this recipe stem from a Dove’s Farm recipe which I then modified.* It makes a  delicious, firm-textured loaf that is delicious sliced, toasted and spread with butter. It is equally tasty with a sweet or savoury topping (e.g. jam and cheese both work well!). A fabulous accompaniment to baked beans. In short – it rocks!

Image

Ingredients

1 tsp yeast (slow acting “traditional” yeast)
45 ml (3 Tbsps) warm water
500 grams wholegrain spelt flour
1 tsp salt
1 tsp honey, sugar or agave syrp
300 ml lukewarm water
15 ml (1 Tbsp) olive oil (cold-pressed virgin preferably)
130 grams dried figs, chopped to 1/4 inch (1/2 cm) dice
80 grams walnuts broken up a bit (not too finely!)
60 ml (4 Tbsps) orange or apple juice

Method

1. Mix the yeast with 3 tablespoons of lukewarm water and leave for 15 minutes.
2. In a large bowl mix together the flour, salt, and sugar.
3. Mix together the yeast mixture, olive oil and the 300 ml of lukewarm water.
4. Knead well for about five minutes until you have a smooth and pliable dough. I use my Kitchenaid mixer for this as I am lazy and it has a bread hook.
5. Leave the dough in a bowl covered with a cloth, in a draught-free place, to double in size.
6. Meanwhile put the chopped figs, walnuts and orange or apple juice in a small bowl and leave them to soak in the orange juice.
7. When the dough has doubled in size, turn it out onto a lightly floured surface, add the soaked figs and walnuts and work them through the dough, kneading firmly for several minutes.
8. Shape the dough and put it into an oiled 1kg/2lb bread tin or place it on an oiled baking sheet. I love a round loaf so I bake it in a small round spring-form pan which I lightly oil with olive oil.
9. Cover & leave dough to rise for about 40 minutes in a warm place. On top of your water heater, above the fridge, the airing cupboard, etc., are all great locales that are usually warmer than the rest of your regular living space. At about the 30 minute mark, if the bread is rising nicely, you should turn your oven on to start pre-heating it.
10. When it has risen to a lovely size, it is time to bake – remember, once you put it in the oven the heat kills the yeast and it will not rise any further, so don’t put it in the oven until it is the size you are hoping for!
11. Bake in a pre-heated oven for 40-45 minutes.
12. Remove from oven, COOL IN PAN for 10-15 minutes, then gently turn out onto rack to finish cooling.

Store in thick ziplock plastic bag or other airtight receptacle.

Re: Oven Temperature 

Oven 425°F (220°C)
Convection (Fan) oven:  425°F (200°C or Gas 7)

I baked it at about 375°F (fan oven) as it was browning too quickly – the baking temperature is not set in stone – everyone kind of knows their own oven and its idiosyncrocies , so adjust temperature (lower) as you see fit.

* The original recipe is found here: http://www.dovesfarm.co.uk/recipes/fig-and-walnut-bread/